
RDLC reports provide a flexible solution for generating reports within your application, allowing you to display data in a structured and visually appealing format. Traditionally, RDLC reports are generated and rendered through the SSRS server, which requires a dedicated infrastructure and setup. However, there are situations where you may want to generate these reports directly from your application without relying on an SSRS server.
In this tutorial, we will explore the concept of local RDLC report generation, enabling you to leverage the capabilities of RDLC files within your application’s context. We will cover the necessary steps and techniques to create, design, and populate RDLC reports, all without the need for a separate SSRS server.
Before we start – if you are only interested in generating PDF document, I strongly suggest using this library:
https://www.questpdf.com/
We will use the following library (can be installed as a NuGet package):
https://github.com/lkosson/reportviewercore
IMPORTANT: This project is a port of Microsoft Reporting Services (Report Viewer) to .NET Core 3.1+. It is feature-complete, but keep in mind it is not officially supported by Microsoft.
Important to note that this package has some limitations:
- Spatial SQL types: The usage of Microsoft.SqlServer.Types package, which is only available in .NET Framework, is required for Spatial SQL types. However, reports using SqlGeography won’t load without it.
- Expression sandboxing and code security: It is crucial not to load and execute reports from untrusted sources to ensure code security and prevent potential vulnerabilities.
- Interactive web report preview: The interactive web report preview feature is closely tied to WebForms and ASP.NET architecture. Porting it to ASP.NET Core would necessitate significant codebase rewriting.
- WinForms control designer: If you want to use ReportViewer in your WinForms project, you need to add the control programmatically, as shown in ReportViewerCore.Sample.WinForms\ReportViewerForm.cs.
- Single .exe deployment: When compiling to a single file, the ability for Roslyn to reference .NET and ReportViewer assemblies at runtime is lost. This means that any non-trivial report won’t compile.
- Map control: Although not extensively tested, the map control is included in the project.
- System.Drawing deprecation: Starting from .NET 6, Microsoft deprecated System.Drawing on non-Windows platforms and completely removed it in .NET 7. This change causes issues with reports using images on those platforms. To overcome this, you can use the Linux rendering workaround mentioned earlier.
Version conflict workaround: If you encounter a “Version conflict detected for ‘Microsoft.CodeAnalysis.Common'” error when adding this NuGet package, you can try adding either Microsoft.CodeAnalysis.CSharp.Workspaces 3.6.0 or Microsoft.CodeAnalysis.Common 3.6.0 manually, selecting the version 3.6.0. For .NET 5, use version 3.8.0, and for .NET 6, use version 4.0.1.
In this tutorial we will add the package to a .NET Web API and use it to generate a simple report.
Install the package
Run: dotnet add package ReportViewerCore.NETCore
Creating the report
Before adding the report to your project, you need to install the Report Designer plugin/extension.
Visual studio 2019
Visual studio 2022
After installing one of those packages, add the report. I named mine example.rdlc

If the “Report Data” properties as shown on the left side not visible for you, toggle them via View -> Report Data or ctrl + alt + D.
Creating models
Let’s start by creating the models which will represent the datasets we are going to use in the report.
Model 1 – OrderDto
public class OrderDto
{
    public OrderDto()
    {

    }

    public OrderDto(string customerName, string reference)
    {
        CustomerName = customerName;
        Reference = reference;
    }

    public string CustomerName { get; set; }
    public string Reference { get; set; }
}
Model 2 – OrderLineDto
public class OrderLineDto
{
    public OrderLineDto()
    {

    }

    public OrderLineDto(string name, int quantity, double price)
    {
        Name = name;
        Quantity = quantity;
        Price = price;
        Total = quantity * price;
    }

    public string Name { get; set; }
    public int Quantity { get; set; }
    public double Price { get; set; }
    public double Total { get; set; }
}
We can’t add the datasets to the RDLC report via “Add new dataset” and select the classes. To work around this issue, you can create and add an .xsd file to your project, which contains definitions of the types you wish to utilize in your reports. You have two options for creating this file: either manually create it or utilize the following code snippet to generate one for all the necessary classes.
public static class ReportDatasourceCreator
{
    public static void Create()
    {
        var types = new[] { typeof(OrderDto), typeof(OrderLineDto) };

        var xri = new System.Xml.Serialization.XmlReflectionImporter();
        var xss = new System.Xml.Serialization.XmlSchemas();
        var xse = new System.Xml.Serialization.XmlSchemaExporter(xss);

        foreach (var type in types)
        {
            var xtm = xri.ImportTypeMapping(type);
            xse.ExportTypeMapping(xtm);
        }

        using var sw = new System.IO.StreamWriter("Reports/ReportItemSchemas.xsd", false, Encoding.UTF8);
        for (int i = 0; i < xss.Count; i++)
        {
            var xs = xss[i];
            xs.Id = "ReportItemSchemas";
            xs.Write(sw);
        }
    }
}
Add ReportDatasourceCreator.Create(); in your startup. This ensures the .xsd file is created on startup. After running the project, the .xsd is created and can now be referenced / used in your .rdlc:
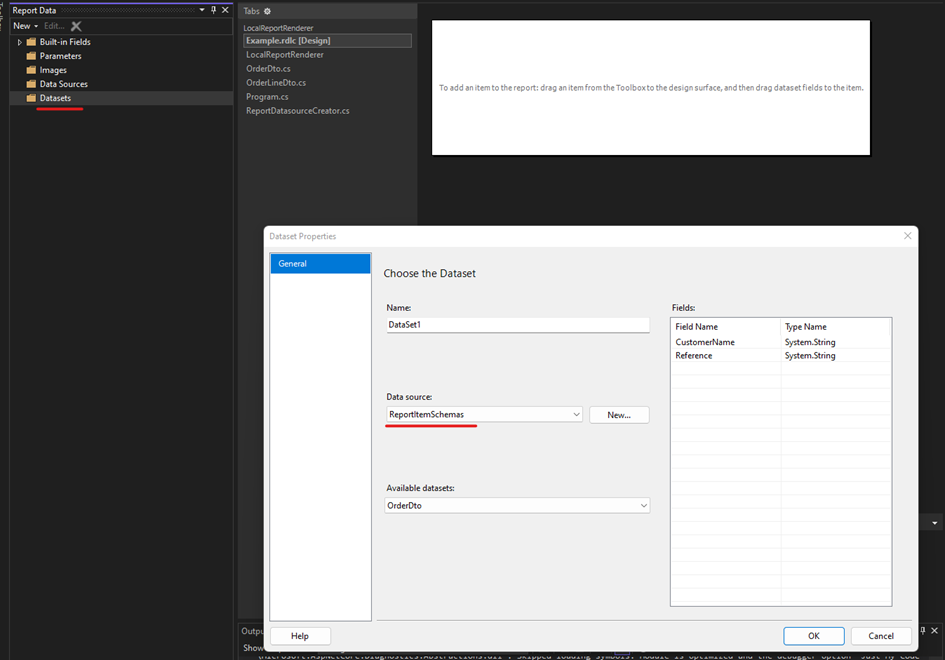
Add both datasets to your report.

Create your report
Time to generate our report – begin by adding a controller “ReportController” with one HttpGet method.
[ApiController]
[Route("[controller]")]
public class ReportController : ControllerBase
{
    [HttpGet(Name = "Generate")]
    public IActionResult Get()
    {
        var order = new List<OrderDto>()
        {
            new OrderDto("Customer #1", "ABC123")
        };

        var lines = new List<OrderLineDto>()
        {
            new OrderLineDto("Product #1", 1, 10),
            new OrderLineDto("Product #2", 3, 5)
        };

        using (var reportDefinition = new StreamReader("Reports/Example.rdlc"))
        {
            LocalReport report = new LocalReport();
            report.LoadReportDefinition(reportDefinition);
            report.DataSources.Add(new ReportDataSource("Order", order));
            report.DataSources.Add(new ReportDataSource("OrderLines", lines));

            byte[] pdf = report.Render("PDF");

            return File(pdf, "application/pdf", "Example.pdf");
        }
    }
}
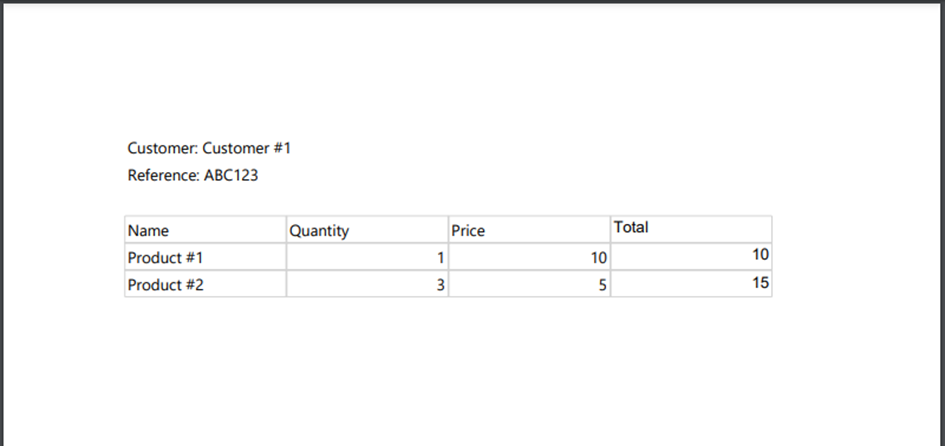
The result:
Full source code can be found here:
https://github.com/DocuBear/LocalReportRenderer