This article describes how to set-up your server for Web Deploy (using the Remote Agent Service). Consider using the Web Deploy Handler if you are using IIS 7 or higher.
Step 1
Download Web Deploy on to the server you want to deploy content to (https://www.microsoft.com/en-us/download/details.aspx?id=43717).
Step 2
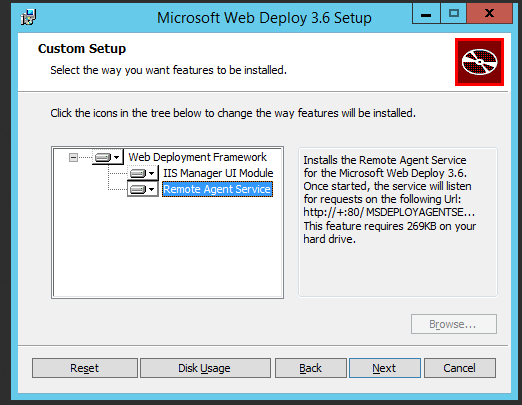
Install Web Deploy, and make sure to select the Custom option in the installer, and enable the Remote Agent Service.
Step 3
After installation make sure to allow traffic (preferably for the IP address you will publish on) to connect to port 80. Otherwise, you won’t be able to connect to the remote service from Visual Studio.
Step 4
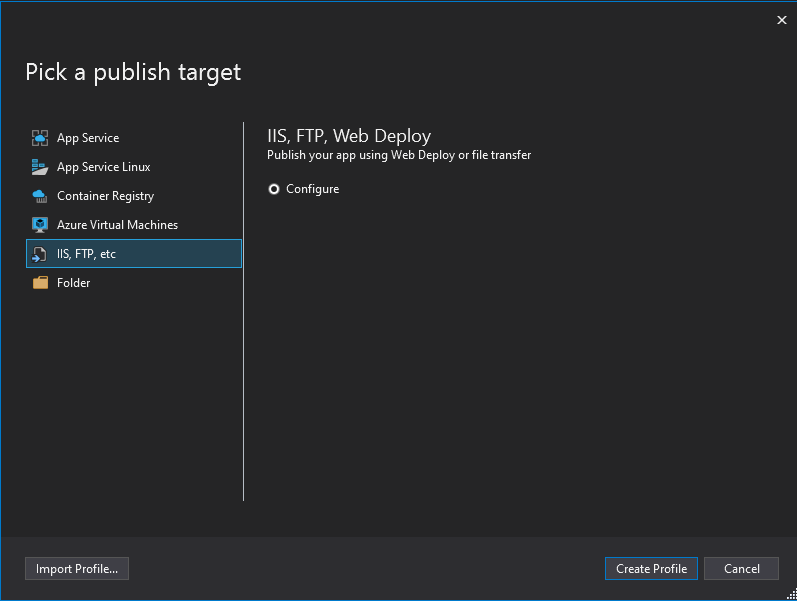
Configure the IIS publish profile in Visual Studio.
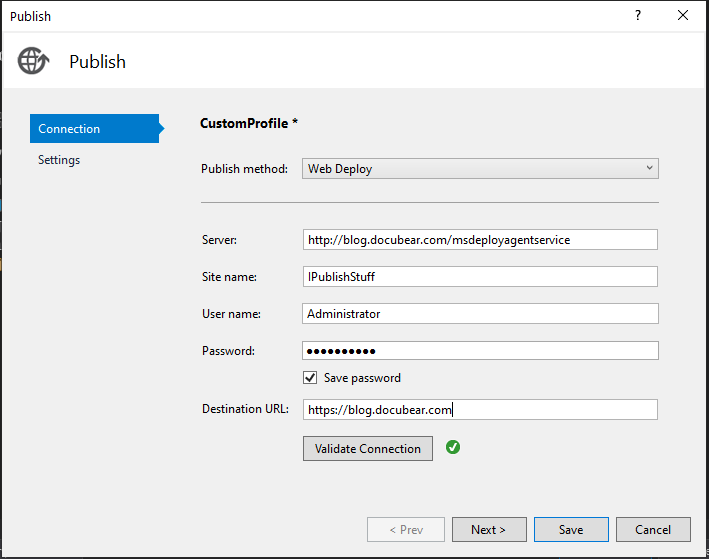
Provide the following information in the publish profile:
- Server: http://{server IP}/msdeployagentservice
- Site name: The site name as configured in IIS.
- Username: Administrator account username
- Password: Administrator password
- Destination url: The URL Visual Studio automatically navigates to when the publishing is complete.
With everything filled in and validated, it should look something like this:
That’s it, you’re done!
However, you might want to add two additional configuration lines to your publish profile. Two things I always add:
- IIS publish offline. This allows IIS to bring the website you are publish to offline. This is useful because with .NET core hosting, some DLL files are locked, resulting in errors when trying to push the data to the server.
- The Environment name attribute. The attribute allows you to publish specific AppSettings configurations with your website, useful for a development, staging and production config.
To add the publish offline and the environment name attribute to the publish profile, you need to edit the configuration file. Find the name of the publish profile you just created, and search for that profilename including .pubxml in the solution explorer.

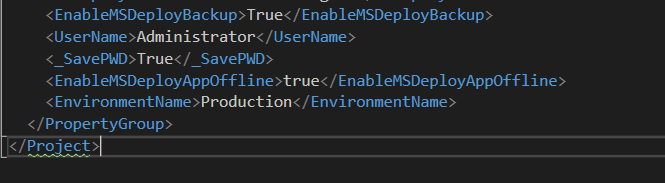
Double click the pubxml file and add the following two lines to the bottom of the config:
    <EnableMSDeployAppOffline>true</EnableMSDeployAppOffline>
    <EnvironmentName>Production</EnvironmentName>
It should look like the following:
Now, when publishing IIS will temporarely bring the IIS application offline, and the published application uses the AppSettings.Production.json file for its settings!