Are you trying to install Web Deploy on an IIS version lower than 7? Use the Remote Agent Service instead.
The proper way to install Web Deploy (from IIS 7 and up) is to use the Web Management Service. This service allows you to easily connect to Web Deploy over a custom port with non-administrator credentials.
This articles guides you step by step through the process!
Prerequisite
- IIS
Stuff to install
- ASP.NET 4.6
- Web Management Service
- Web Deploy 3.6
Automatic installation with PowerShell
If you don’t feel like manually installing the required tools, just execute the following PowerShell script:
# Install ASP.NET 4.6
Install-WindowsFeature Web-Asp-Net45

# Install Web Management Service
Install-WindowsFeature -Name Web-Mgmt-Service

# Install Web Deploy 3.6
# Download file from Microsoft Downloads and save to local temp file (%LocalAppData%/Temp/2)
$msiFile = [System.IO.Path]::GetTempFileName() | Rename-Item -NewName { $_ -replace 'tmp$', 'msi' } -PassThru
Invoke-WebRequest -Uri http://download.microsoft.com/download/0/1/D/01DC28EA-638C-4A22-A57B-4CEF97755C6C/WebDeploy_amd64_en-US.msi -OutFile $msiFile
# Prepare a log file
$logFile = [System.IO.Path]::GetTempFileName()
# Prepare the arguments to execute the MSI
$arguments= '/i ' + $msiFile + ' ADDLOCAL=ALL /qn /norestart LicenseAccepted="0" /lv ' + $logFile
# Execute the MSI and wait for it to complete
$proc = (Start-Process -file msiexec -arg $arguments -Passthru)
$proc | Wait-Process
Get-Content $logFile
The scrips does the following:
– Install ASP.NET 4.6
– Install the Web Management Service and configures it
– Install WebDeploy 3.6
Manual installation
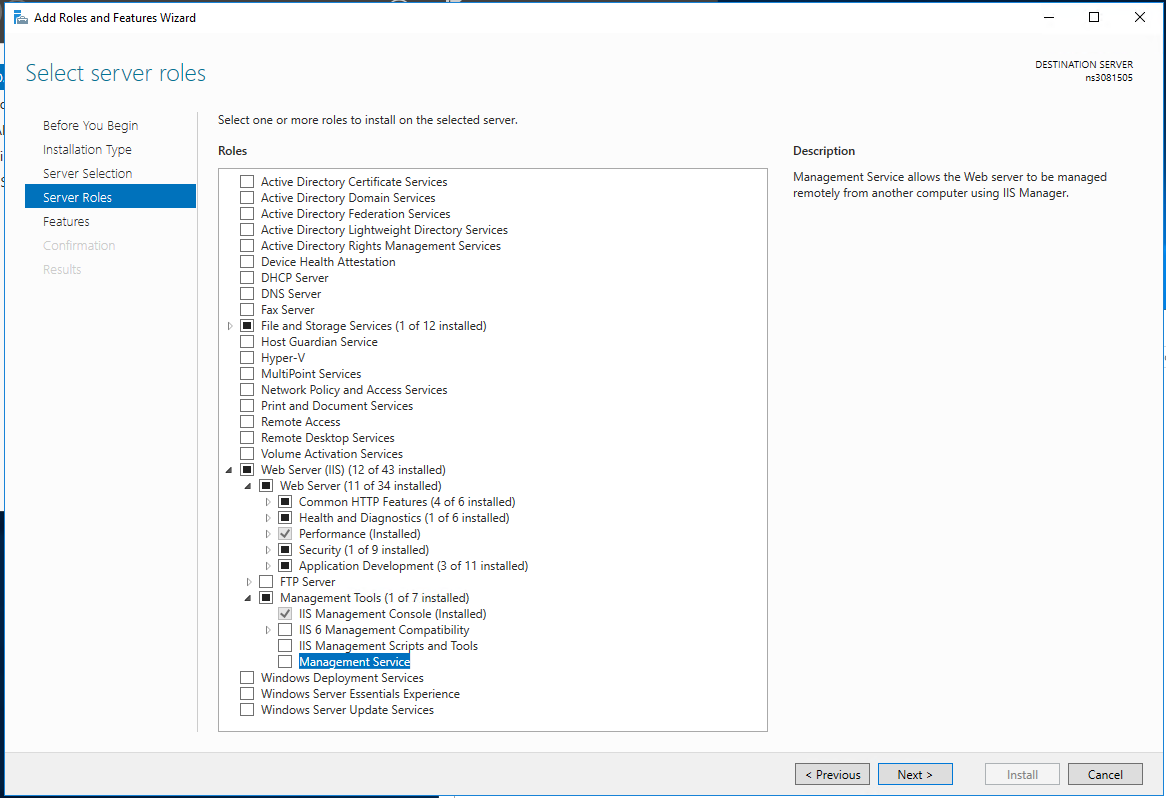
Step 1 – install the Management Service and .NET 4.6
Enable the Management Service in the Windows Roles and Features Wizard:
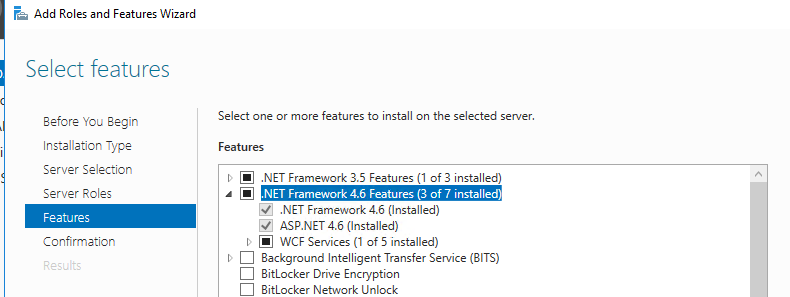
And .NET 4.6
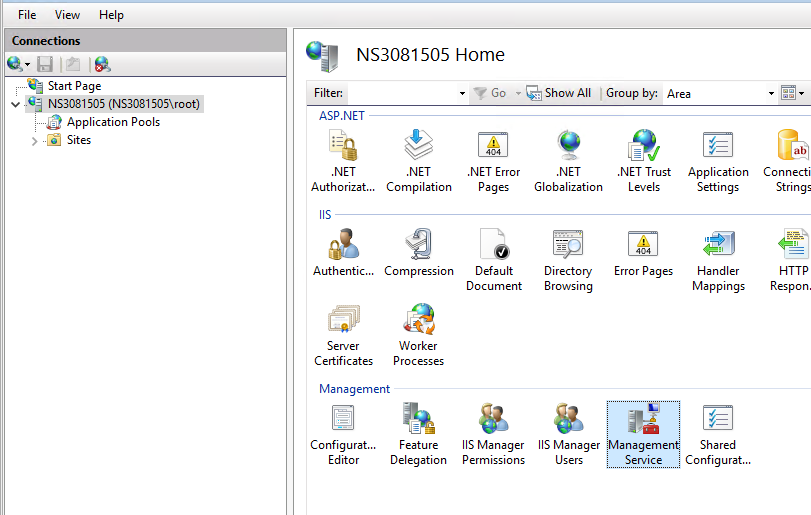
Step 2 – Configure IIS to allow incoming connections
Start IIS, select the root node in the left tree, and open the management service on the bottom right.
Check the ‘Enable remote connections‘ box, and then press the ‘apply’ button in the right panel. After the settings are applied, don’t forget to start the Management Service by clicking ‘Start’ in the right hand panel.
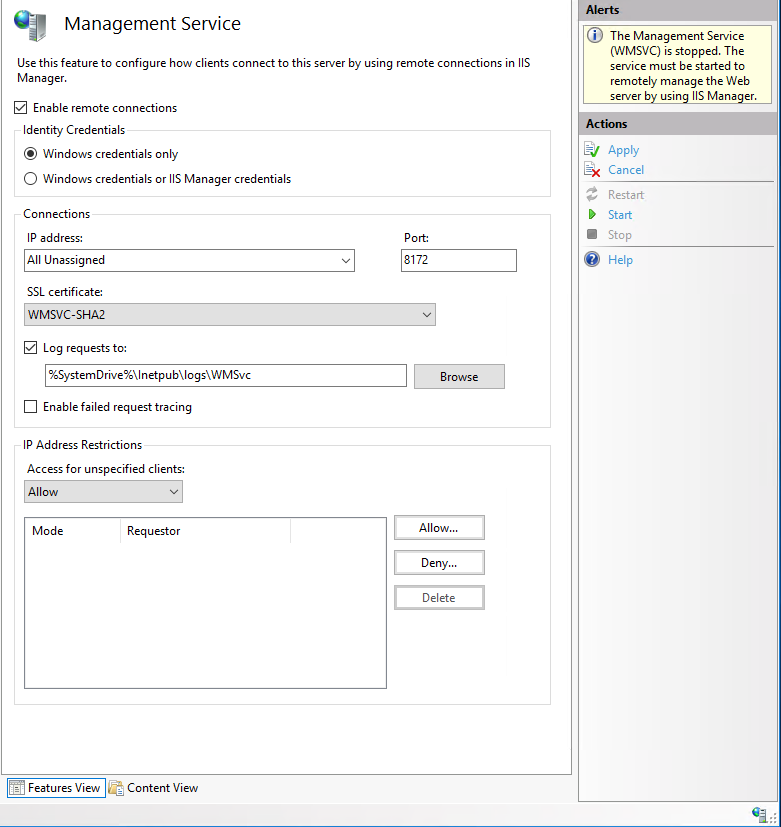
If you like, you can change the default port in the Management Service, and allow specific IP addresses to use it.
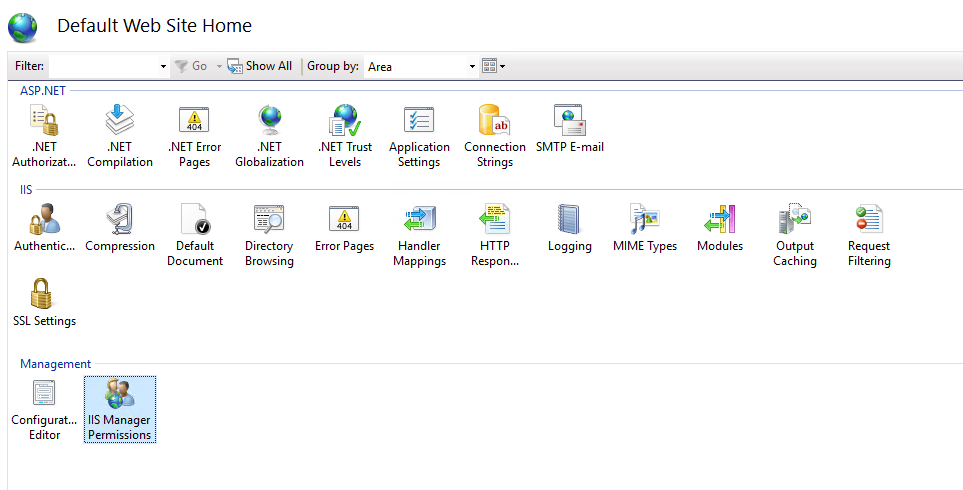
Now, finally you have to add the Windows User that will use to deploy content, to the IIS website you want to deploy content to.
This can be done by clicking on the website in the left navigation bar, and then open the IIS Manager Permissions.
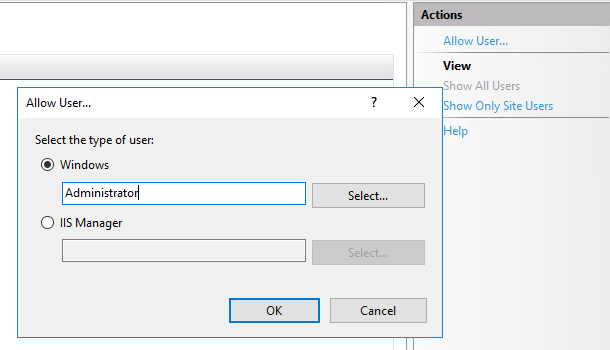
Click the Allow user link at the right navigation bar, and enter a Windows user account.
Step 3 – Install Web Deploy 3.6
Download web deploy: https://www.microsoft.com/en-us/download/details.aspx?id=43717
Install it on the server that you want to publish content to, select the following options when installing:
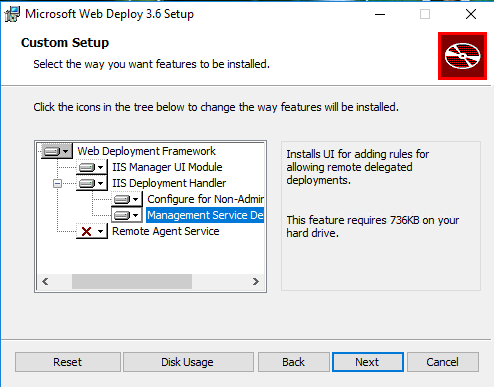
You’re done!
That’s it, the server is not properly configured for web deploy. Do note that you might still have to open/whitelist port 8172 (the default port).
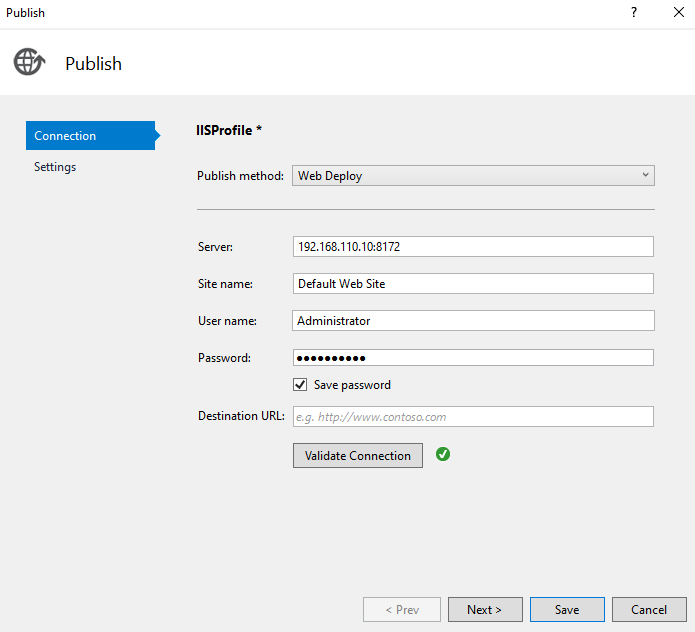
Create a IIS publish profile in Visual Studio, and you’re done.