
This tutorial describes how to set-up a Azure DevOps release pipeline that is able to publish new versions of your software to your Raspberry PI, fully automatic. This tutorial is used with a sample .net core application.
I am currently running a simple program on my Raspberry PI that unlocks my Tesla’s charge port with a button press. So that a lazy bum like me doesn’t have to grab his phone, wait for the Tesla app to boot, wait for the car to wake up from sleepy time, unlock the charge port and then quickly remove the charger from the car.
Anyways… you know how it goes with software development.. you make mistakes and have to release updates or additions to your program. I don’t want to manually copy the new versions to the PI manually each time. So why not just automate that?
Assumptions
- You have an Azure Devops environment. If you don’t, just create one, it’s free and building and releasing projects is also free (up to 1500 minutes a month). Register here: https://azure.microsoft.com.
- You know how to set-up a build pipeline (if not, follow this: https://docubear.com/how-to-setup-ci-and-cd-in-azure-devops-completely-free/).
Create a deployment group
The first thing we need to do is to create a ‘deployment group’ in DevOps. Please note, the program I created for my Tesla is called ‘TeslaControl’, you will see that name pop-up in several screenshots and configurations. Replace that name with whatever your project is called!
Step 1 – Navigate to Deployment groups
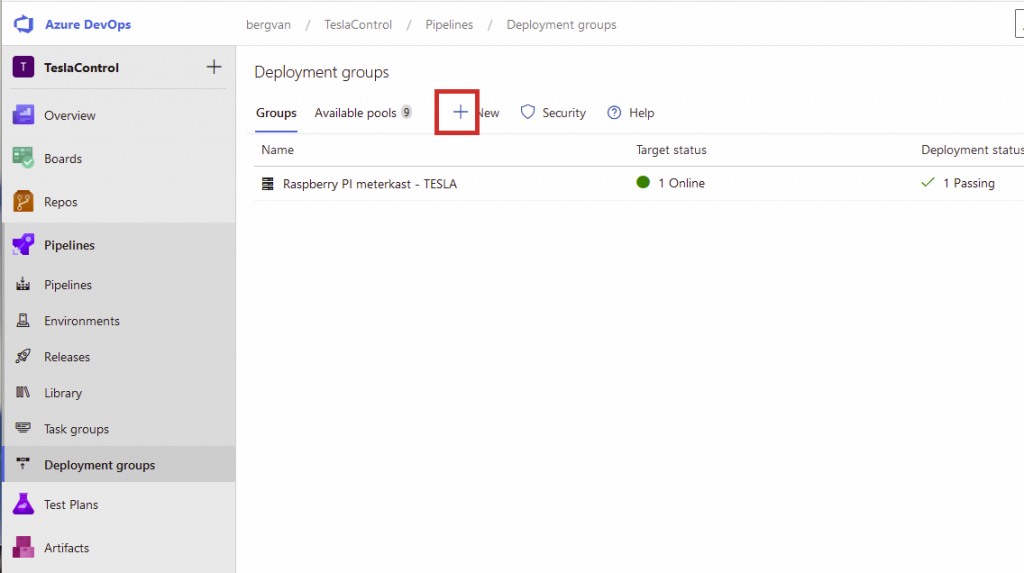
Navigate to the project that contains your source code, click on the pipelines section and then open the Deployment groups.
Step 2 – Add a new group
Click on the + button at the top of the page:
Step 3 – Specify a name for your group
I called mine ‘Raspberry PI meterkast (which is Dutch for ‘fuse box’) – TESLA. But you can name yours whatever you want. A deployment group can have multiple targets (devices) so you may want to enter a more generic name.
Press the Create button, then switch the target type from Windows to Linux, check ‘Use a personal access token in the script for authentication’. It should look something like this:
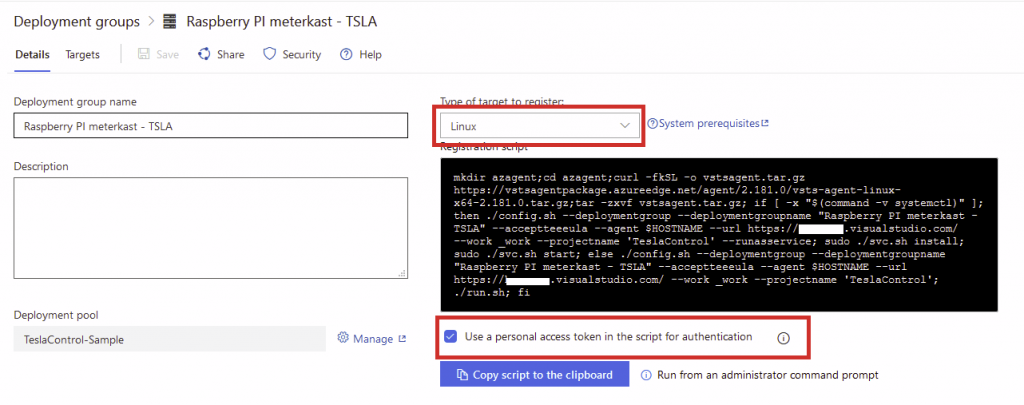
Step 4 – Copy the script and replace x64
Copy the script with the ‘Copy script to the clipboard’ button. Don’t direcly copy from the black prompt as that will not automatically add the PAT, which is annoying.
The 64 bit script cannot run on the PI, so we will be replacing that with the ARM one. In the script, replace “vsts-agent-linux-x64-x.xxx.x” with “vsts-agent-linux-arm-x.xxx.x“.
That’s it, now run it in a SSH session on your PI.
After downloading and installing various stuff, it will ask you two questions:

Press ‘enter’ for both..
Finally, you will see something like below in the session. That means it’s done installing.

Go back to your deployment groups overview and you should now see the group you just created with the status ‘1 online’!
Create a release pipeline
Now that we have an actual target to deploy to we can create our deployment pipeline!
Step 1 – Navigate to the releases section
In your DevOps project, navigate to the Pipelines -> Releases section.
Step 2 – create a new release pipeline
Click on the ‘+’ button at the top and press ‘New release pipeline’.
Step 3 – Configure the pipeline
Another window should show and the follow will be visible:
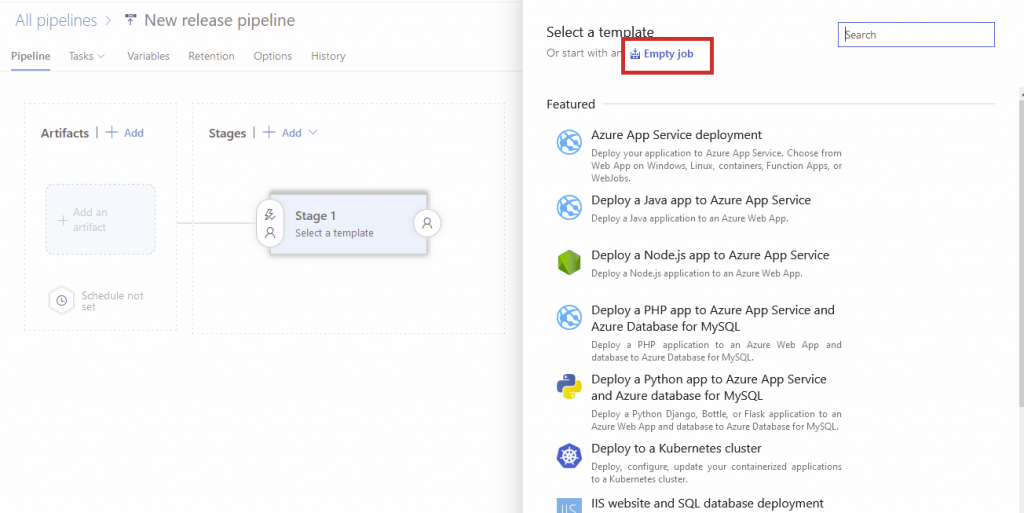
Click on the ‘Empty job’ link to skip a default template selection.
Press the large ‘Add an artifact’ field:
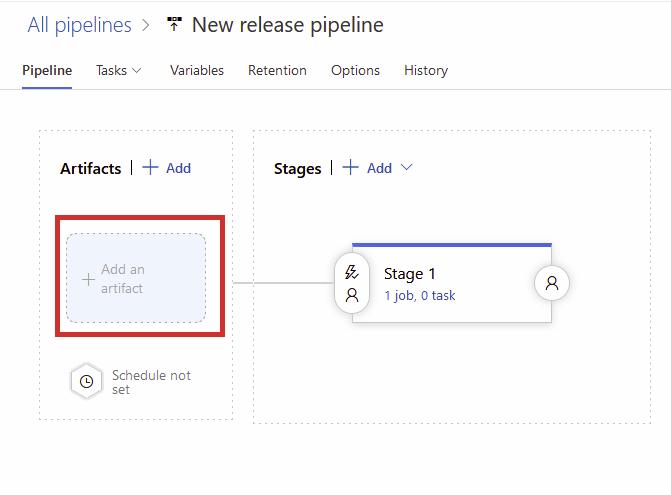
Enter/select the following details in the window that popups:
Project: Select the project you are currently working in (should be selected by default),
Source: Select your build pipeline (I only have a pipeline on my master branch, so I selected the only one),
Default version: Latest
Source alias: _{projectname} (default value).
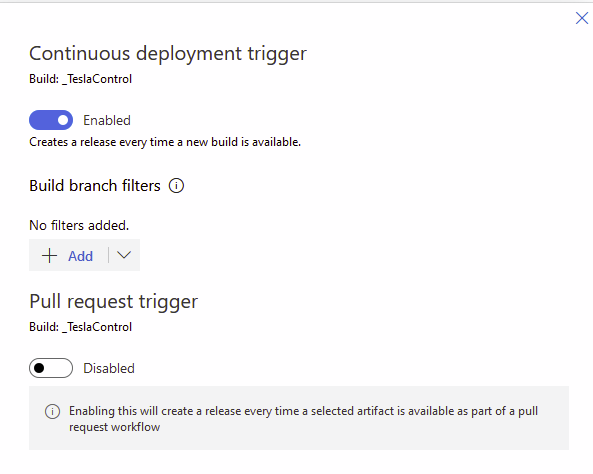
If you want to automatically release a new version when the connected build pipeline is done building, click on the lightning bolt and enable the ‘Continuous deployment trigger’ toggle..
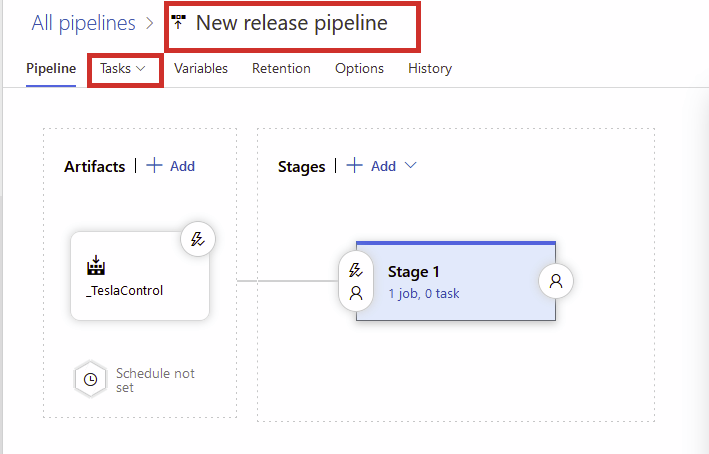
Step 4 – Enter a name for your pipeline and configure a job
Click on the ‘New release pipeline’ title at the top of the page and give your pipeline a name ({project} raspberry PI release for example). Then click on the ‘Tasks’ button.
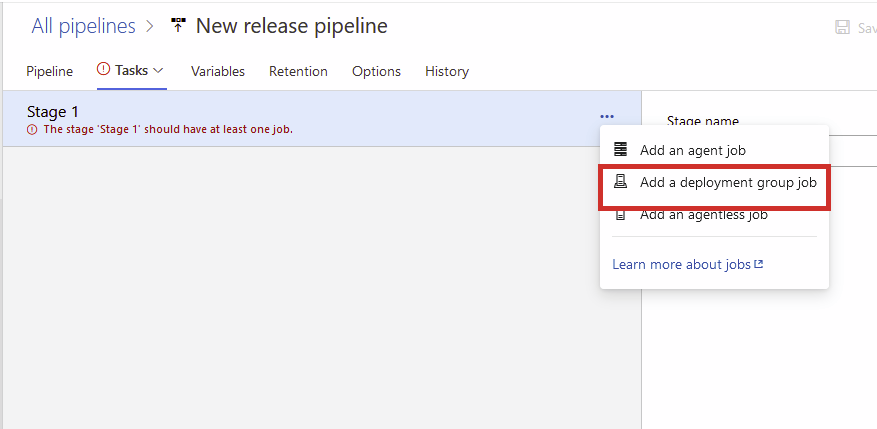
First, click on the ‘Agent job’ row and then press the garbage bin icon at the top right to remove it.
Then click on the 3 dots and press ‘Add a deployment group job’:
Click on the record that has just appeared, at the right window configure the following settings for the job:
Deployment group: select the deployment group that we created in th first part of this tutorial!
That’s it for the deployment group job!
Step 5 – Add tasks to the deployment group
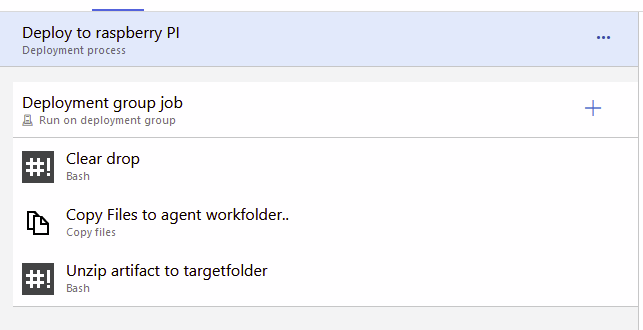
We are almost done.. we just need to add 3 tasks to the deployment group. Press the ‘+’ icon on the deployment group job record and add the following tasks:
- Bash task
- Copy files
- Bash task
You can drag and drop the tasks so they are in the order: Bash task – Copy files – Bash task.
Configure the tasks as follows:
Task 1 (Bash task)
Display name: Clear drop
Type: Inline
Script: sudo rm $(Agent.WorkFolder)/_TeslaControl/drop/TeslaControl.zip
This task clears the folder that the pipeline uses to store the zipped published files on the Raspberry PI. This task is executed because the copy file task wouldn’t overwrite the current zip file on the PI.
Task 2 (copy files task)
Display name: Copy Files to agent workfolder
Source folder: $(System.DefaultWorkingDirectory)/_TeslaControl/drop
Contents: **
Target folder: $(Agent.WorkFolder)/_TeslaControl/drop
This task copies the .zip file that your build pipeline created to the Raspberry PI.
Task 3 (Bash task)
Display name: Unzip artifact to targetfolder
Type: Inline
Script: sudo unzip -o “$(Agent.WorkFolder)/_TeslaControl/drop/TeslaControl.zip” -d /home/pi/TeslaControl/
This last task unzips the file and places the content in the proper folder. So make sure that ‘/home/pi/TeslaControl’ is changed to wherever your project files are located on your Raspberry PI.
Don’t forget to rename the TeslaControl content to whatever your projectname is! Now, what do these tasks do?
Te final overview should look something like this:
That’s it! You’re finished. You can manually create a release by navigating back to the ‘Releases’ section, clicking on your freshly created pipeline and pressing the blue ‘Create release’ button in the top right corner. If you have enabled continuous deployment, this release pipeline will execute each time your build pipeline has run and produced a zip with the published project files. It copies the files to your PI and overwrites the current project files with the updated ones!