
Learn how to create a Windows service with a build in scheduler to periodically execute background tasks in .NET 7.
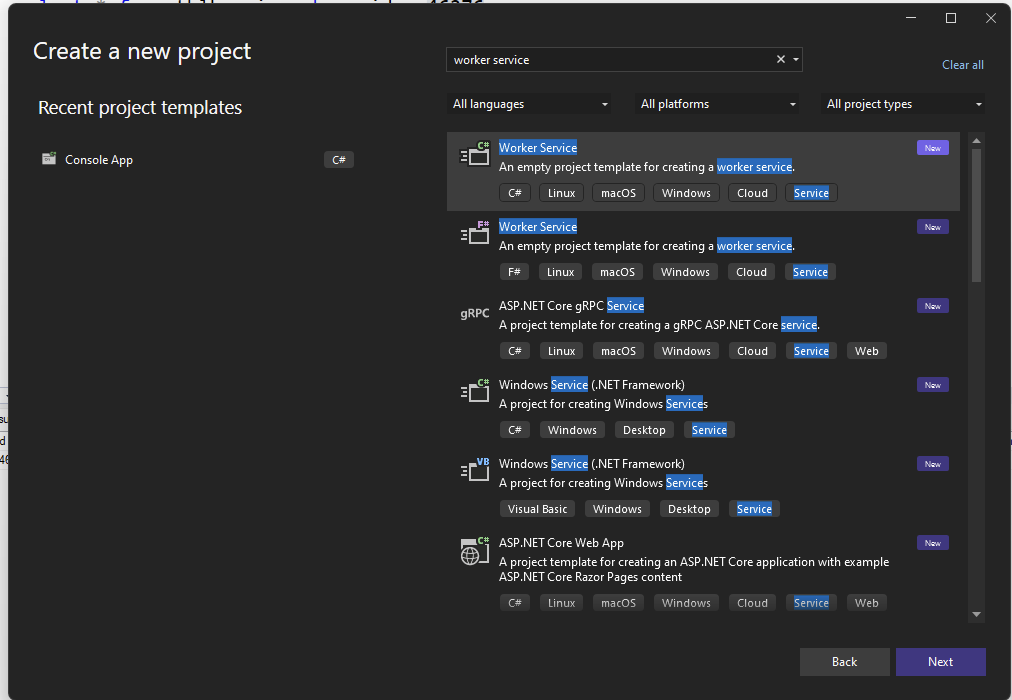
Step 1 – Create a new Worker Service project in Visual Studio
Step 2 – Add the required NuGet packages
Add Microsoft.Extensions.Hosting.WindowsServices
and Quartz.Extensions.Hosting
Step 3 – Add a simple method
Let’s create a really simple method that logs the current timestamp to a file. We create a new folder ‘Services’ and add the class ‘LogService.cs’. Add the following content:
namespace TestWorkerService.Services;

public class LogService
{
    public async Task CreateLogRecord()
    {
        File.WriteAllText("test.txt", DateTime.Now.ToString());
    }
}
We want to periodically run this code. We are going to use Quartz for that (details). This package uses a ‘Job’ to execute the service code. So add a ‘Jobs’ folder to the root and then add a ‘LogJob.cs’ file. Add the following contents:
using Quartz;
using TestWorkerService.Services;

namespace TestWorkerService.Jobs;

public class LogJob : IJob
{
    public async Task Execute(IJobExecutionContext content)
    {
        var logService = new LogService();
        logService.CreateLogRecord();
    }
}
This job has a reference to our LogService to actually execute our logging method.
The hosting package allows us to host our Worker Service as a Windows Service. The Quartz extension is used to schedule tasks. For example, to run our logging method.
Step 4 – Extend our program.cs
We need to make some changes to the program.cs file for our Worker Service to run as a Windows Service and to periodically execute our job.
Replace the program.cs contents with:
using Quartz;
using TestWorkerService;
using TestWorkerService.Jobs;

IHost host = Host.CreateDefaultBuilder(args)
    .UseWindowsService()
    .ConfigureServices((context, services) =>
    {
        var config = context.Configuration;
        services.AddHostedService<Worker>();

        services.AddQuartz(x =>
        {
            x.UseMicrosoftDependencyInjectionJobFactory();
            x.AddJob<LogJob>(new JobKey("LogJob"));
            x.AddTrigger(opt => opt
                .ForJob(new JobKey("LogJob"))
                .WithIdentity("Logjob-trigger")
                .WithSimpleSchedule(h => h.WithIntervalInHours(1).RepeatForever())
            );
        });
        services.AddQuartzHostedService(x =>
        {
            x.WaitForJobsToComplete = true;
        });
    })
    .Build();

host.Run();
Notice the .UseWindowsService() at the third line and the ConfigureServices method. In this method we define what the service needs to do. We use Quartz to trigger our Logging Job once every hour and we repeat it forever.
Step 5 – Publish your worker service
I use the following settings when publishing to a folder:

The deployment method is ‘self-contained’, useful if you don’t want to or can install additional .net packages on your server.
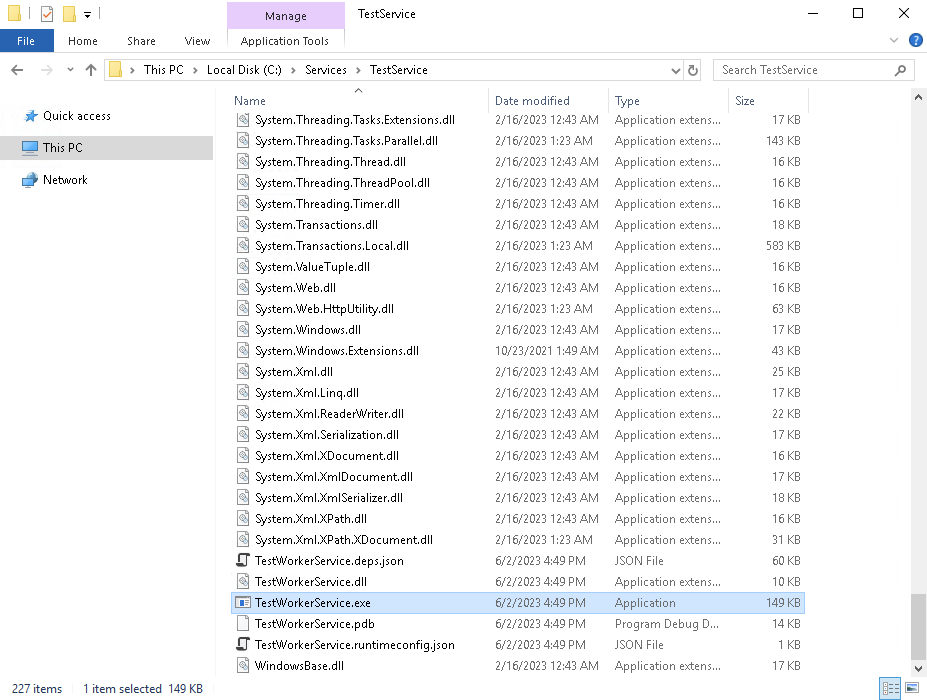
Step 6 – Copy the published contents to the machine you want to run it on
I have created C:\Services\TestService and added the release contents:
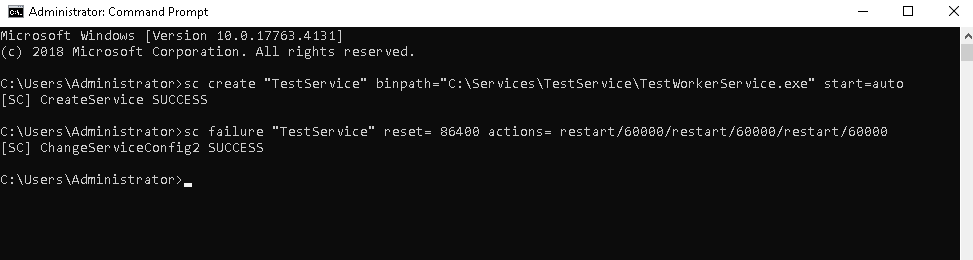
Now, we still need to create our service. To do this, run the following command:
sc create "TestService" binpath="C:\Services\TestService\TestWorkerService.exe" start=auto
Where binpath is the full path to the executable of your released worker service.
Then run:
sc failure "TestService" reset= 86400 actions= restart/60000/restart/60000/restart/60000
The first command created the service, the second commands configures the service to automatically restart whenever something happens to it.
You should see the following after running both commands:
If you look at the services you should be able to find the service that you just created:
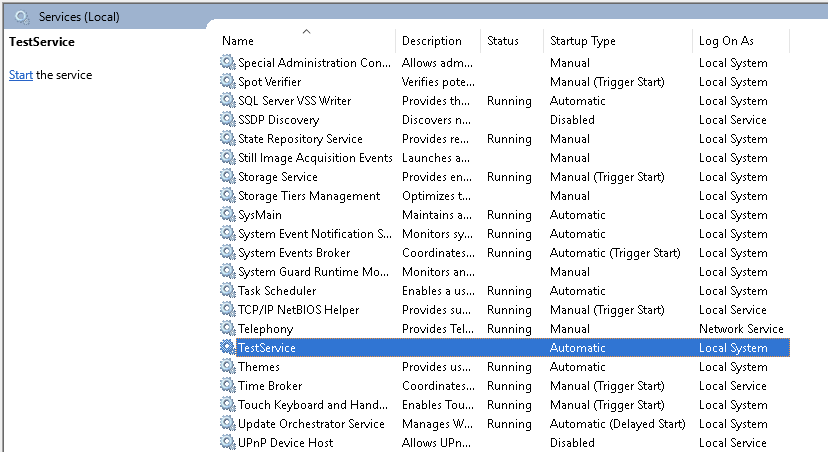
That’s it, you now have a working Windows Service built with .NET! Feel free to let me know if you any problems when creating your own Windows Service!