
As you probably already know, hosting your code in Azure Devops is completely free (with certain limits that is). You might not know know, however, that Azure Devops also has free build minutes.
If you don’t know DevOps yet, check it out here: https://azure.microsoft.com/services/devops/.
What does that even mean? Well, that means that you won’t have to manually build and publish your project to your server(s) anymore. You can pretty much fully automate that.
I have posted a few of our frequently used Azure DevOps Build Pipeline configurations at the bottom. We have a configuration for the following situations:
- .NET Core 3.1 MVC with NPM and Gulp
- .NET Framework MVC with NPM and Gulp
- .NET Core 3.1 API/Console/Class library project
- Angular 9/10
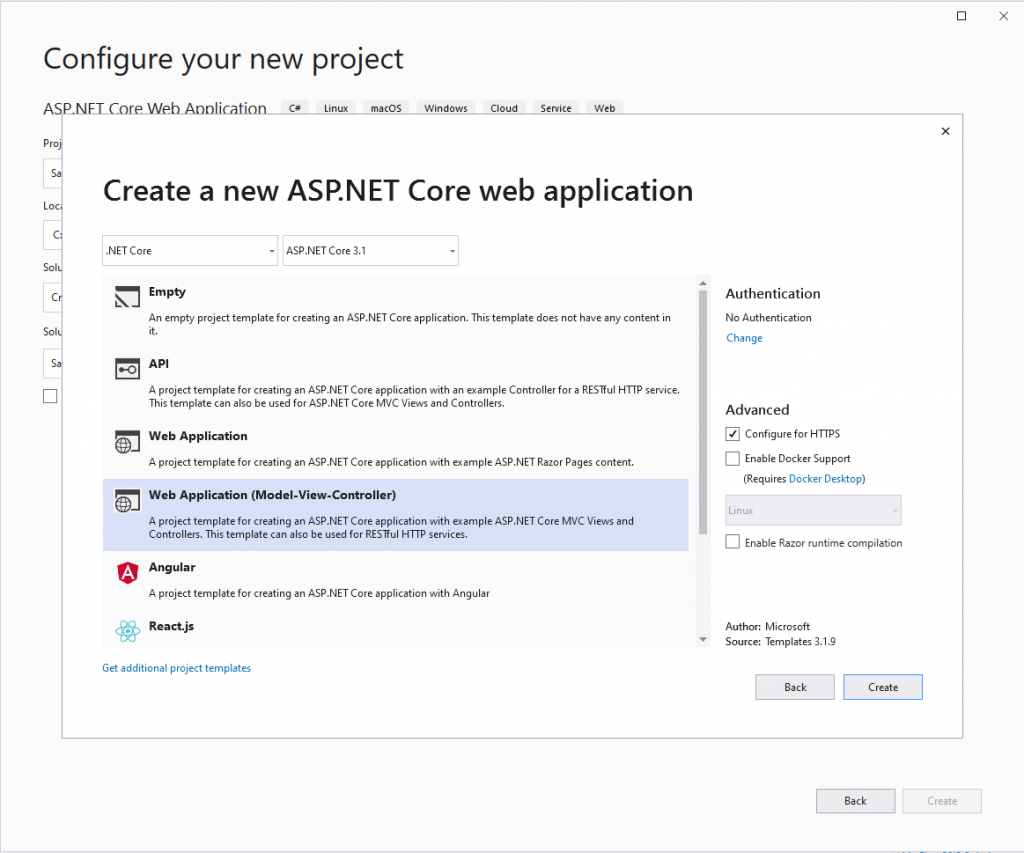
This article shows how to set it all up with a new .net core web application, I am using a freshly generated ASP.NET Core web application (Model-View-Controller) template.
Create a new pipeline
Navigate to your DevOps environment, open the project you want to create a pipeline for and click on Pipelines in the left menu.
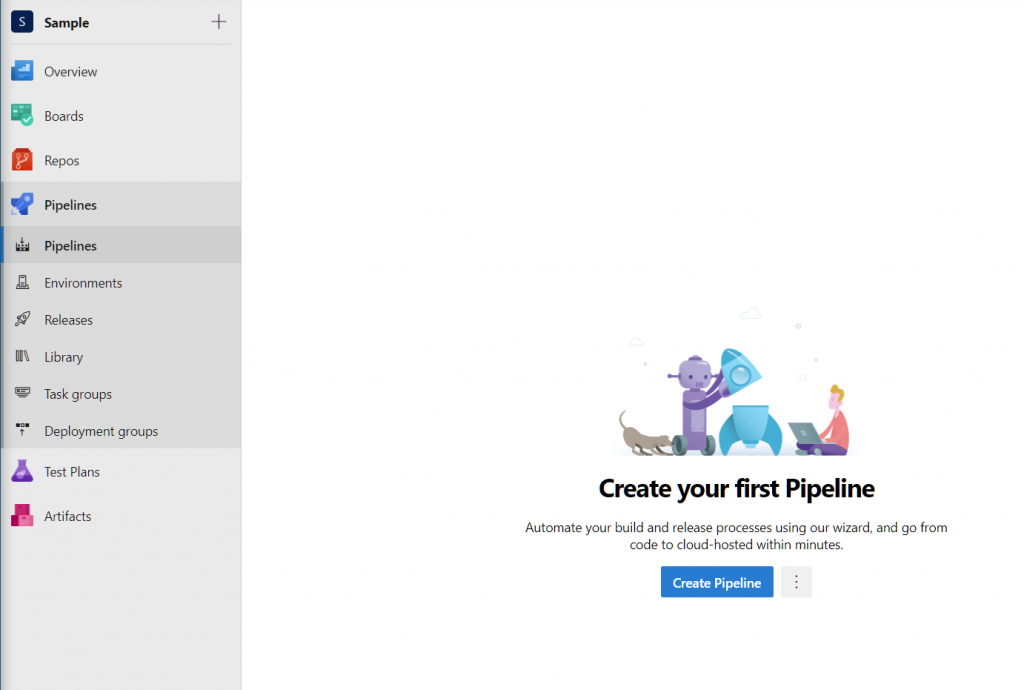
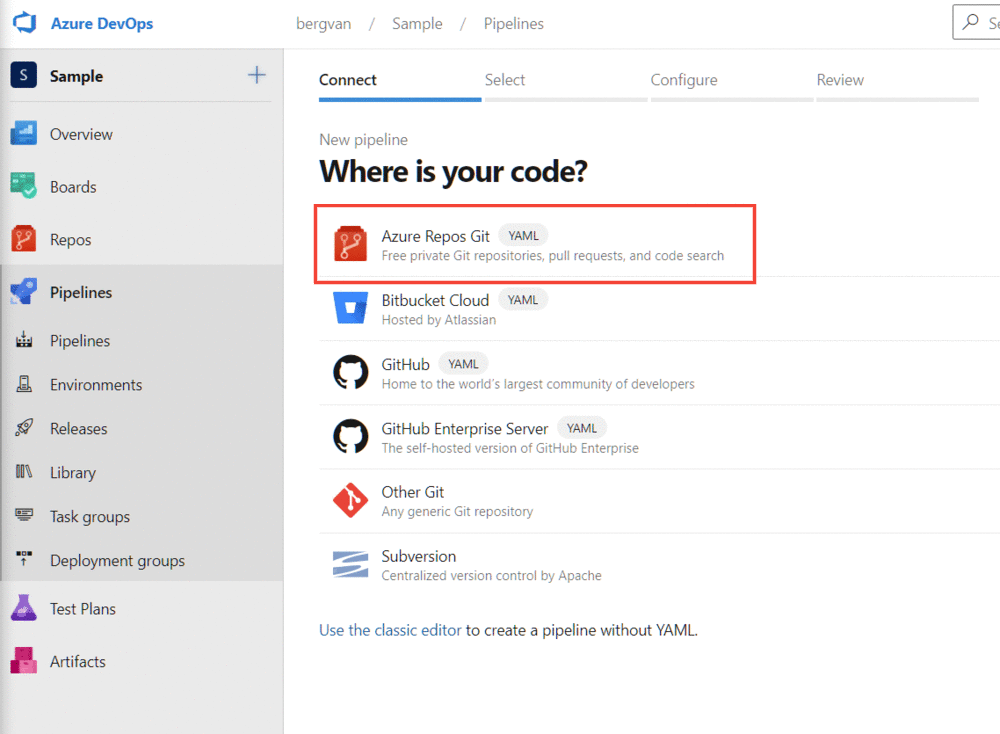
Step 1 – Click on the ‘Create Pipeline’ button and then select ‘Azure Repos Git’.
Step 2 – Select the repository you are working in
I created a project called “Sample” which defaults with a “Sample” repository, so I select that one!
Step 3 – Select the pipeline configuration
Since we are using .NET Core, we will be selecting the appropiate template, press the ‘show more’ button and scroll down until you see ASP.NET Core and select it.
Step 4 – The actual pipeline configuration
Now, Azure devops shows us the default content, which is not much..
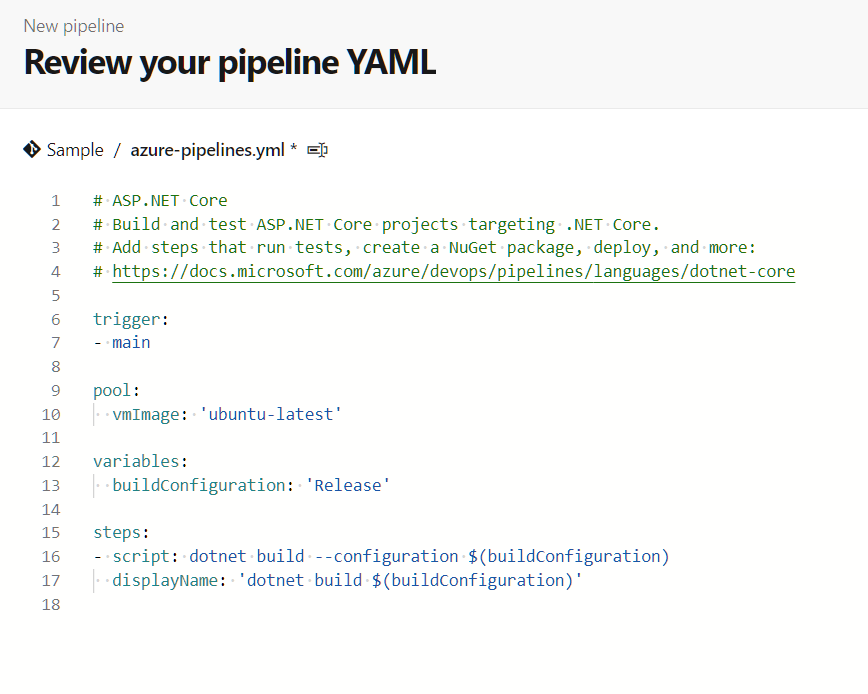
I replaced it with the following content:
# ASP.NET Core
# Build and test ASP.NET Core projects targeting .NET Core.
# Add steps that run tests, create a NuGet package, deploy, and more:
# https://docs.microsoft.com/azure/devops/pipelines/languages/dotnet-core

trigger:
- main

pool:
  vmImage: 'ubuntu-latest'

variables:
  buildConfiguration: 'Release'


steps:
- script: dotnet build Sample/Sample/Sample.csproj --configuration $(buildConfiguration)
  displayName: 'dotnet build Sample/Sample/Sample.csproj $(buildConfiguration)'

- task: DotNetCoreCLI@2
  inputs:
    command: 'publish'
    publishWebProjects: false
    projects: '**/Sample.csproj '
    arguments: '--configuration $(buildConfiguration) --output $(Build.ArtifactStagingDirectory) /p:EnvironmentName=Production'

- task: PublishBuildArtifacts@1
  inputs:
      targetPath: '$(Build.ArtifactStagingDirectory)'
The following modifications were made:
dotnet build – I added the path to the csproj file, this is especially useful if you have multiple projects in your solution and only want to build one. The build pipeline builds everything by default, which adds a lot of unnecessarily minutes to your build time.
dotnet publish – This generates the files ready for publishing, the path to the csproj is also added here. As well as a /p: EnvironmentName variable. This variable corresponds to your appsettings.{environment}.json file and makes it easy to publish your files with the right configuration.
Publish build artifacts – you need this step for the release pipeline, this is the artifact that you will publish to your destination server.
That’s pretty much it for this step, please do note however that this project is fairly simple. No NPM/Yarn or bundling. I will post a few different frequently used build pipeline configurations at the bottom of this article.
Create a release pipeline
Click on the Releases button in the left side menu to open the Releases pipelines section. Click the New pipeline button.
We will be publishing to IIS in this example. Search for IIS website deployment in the template selector that pops up. Select it and press apply.
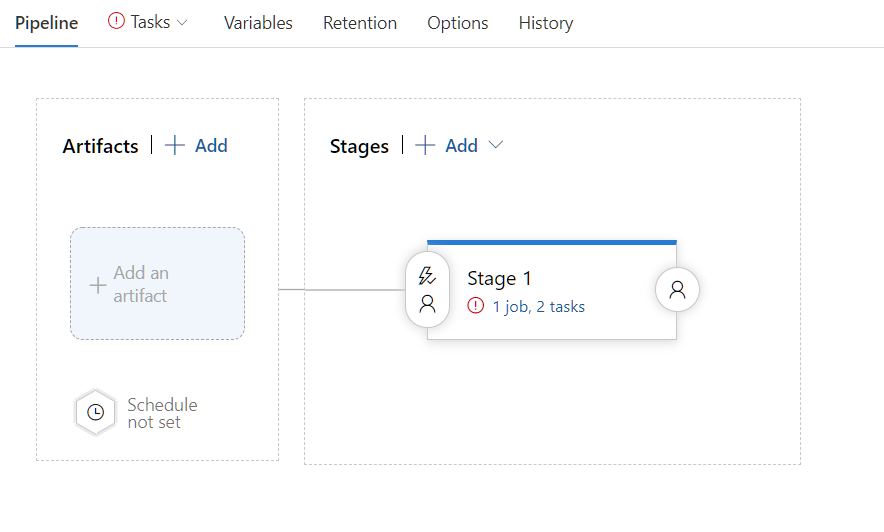
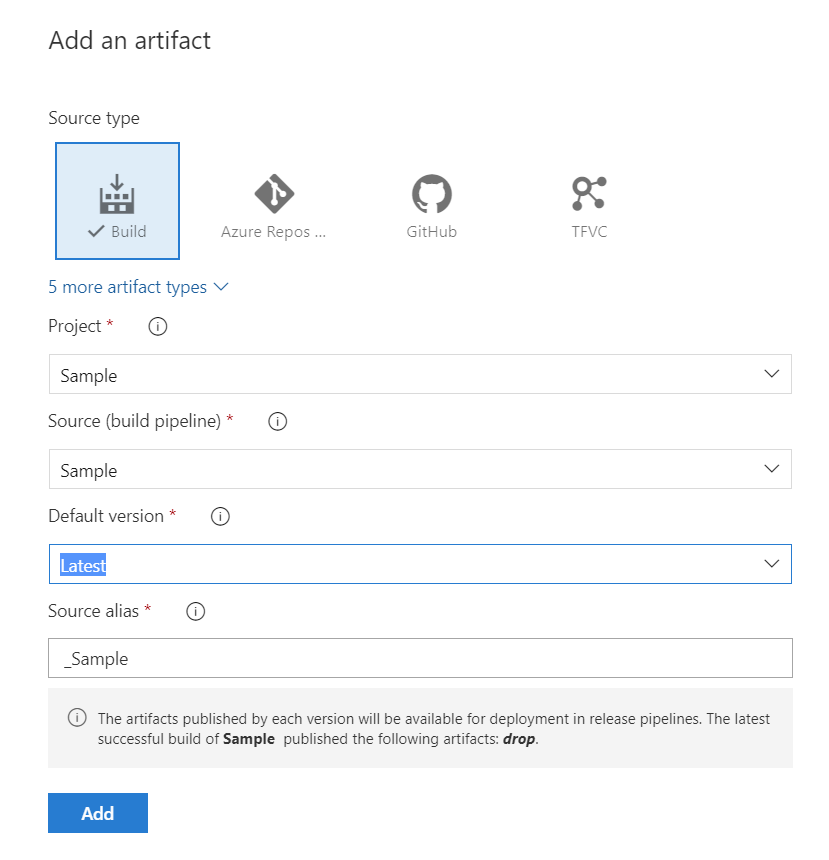
Step 1 – Click on the add an artifact text and select the settings as provided below (if you have a different repository name, you will see a different source project name).
Step 2 – Configure your Continious Deployment triggers
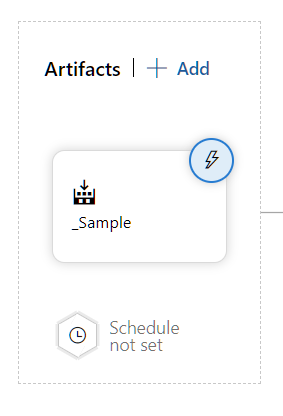
Press the lightning icon, and configure the settings as follows:
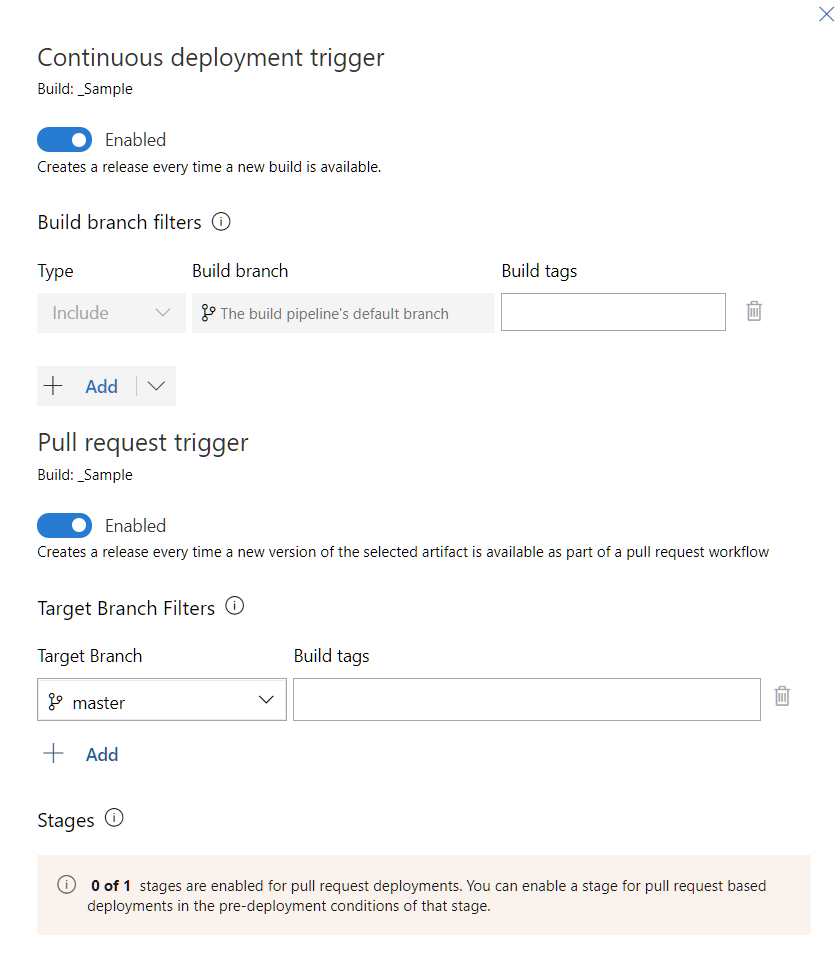
This triggers the release pipeline each time the build pipeline is built. So, whenever you commit or submit a PR to the master branch it will be built and then deployed through this release pipeline. If you do not want that, just don’t enable these triggers and manually create a release whenever you want to run this pipeline.
Step 3 – Configure the IIS deployment
Now that we selected our artifact from the build pipeline, it’s time to configure the ‘release stage’. Click on the ‘Tasks’ section at the top to configure ‘Stage 1’.
We have to configure the various IIS steps by clicking on each row and configuring whatever is inside. Click on ‘IIS deployment’ to start.
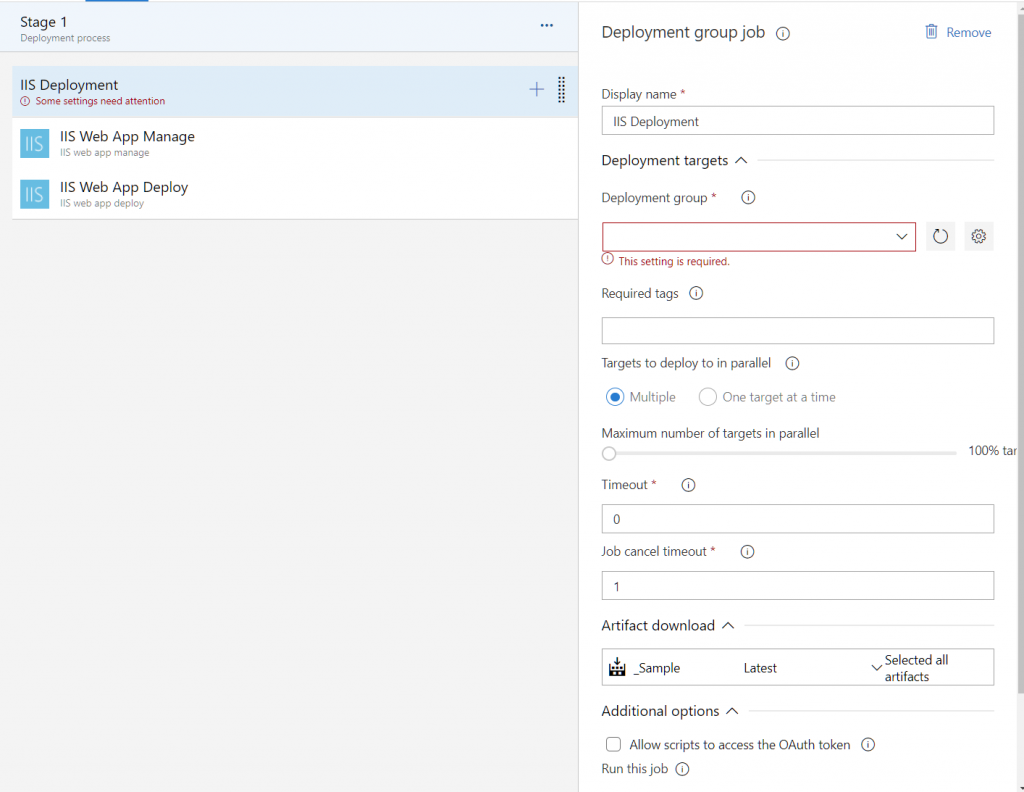
Click on the gear wheel icon right next to the ‘Deployment group’ to configure a group, then follow the steps on the page, the instructions are quite clear! The deployment group holds your machine(s) that you want to deploy your application to. Make sure to enable the ‘Use a personal access token in the script for authentication’ so that you don’t have to generate one manually when installing the worker on your server.
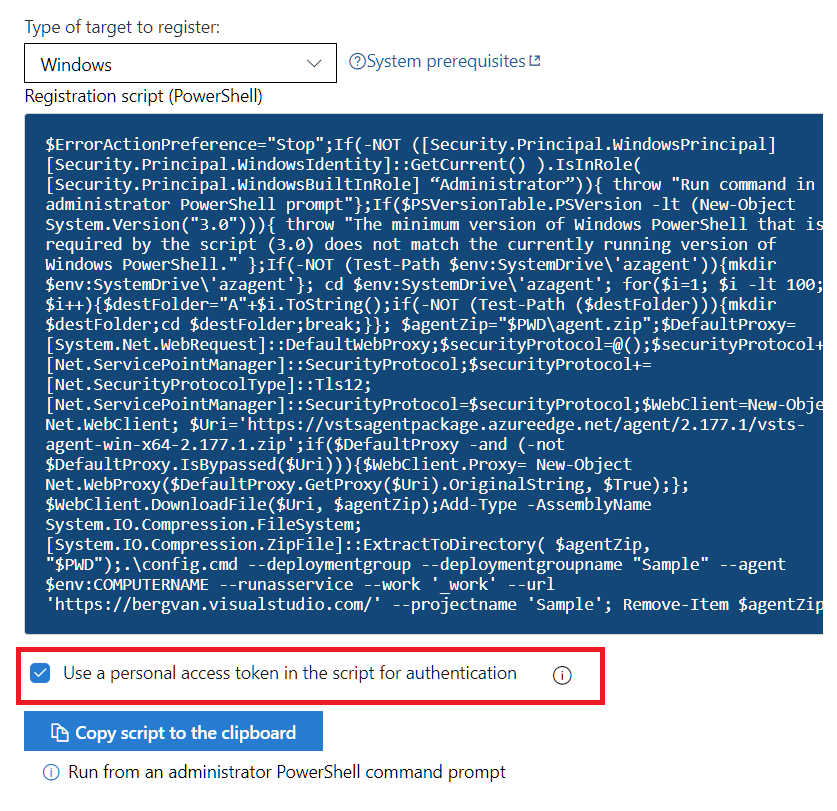
After executing this Powershell script, select the deployment group in your deployment group selector.
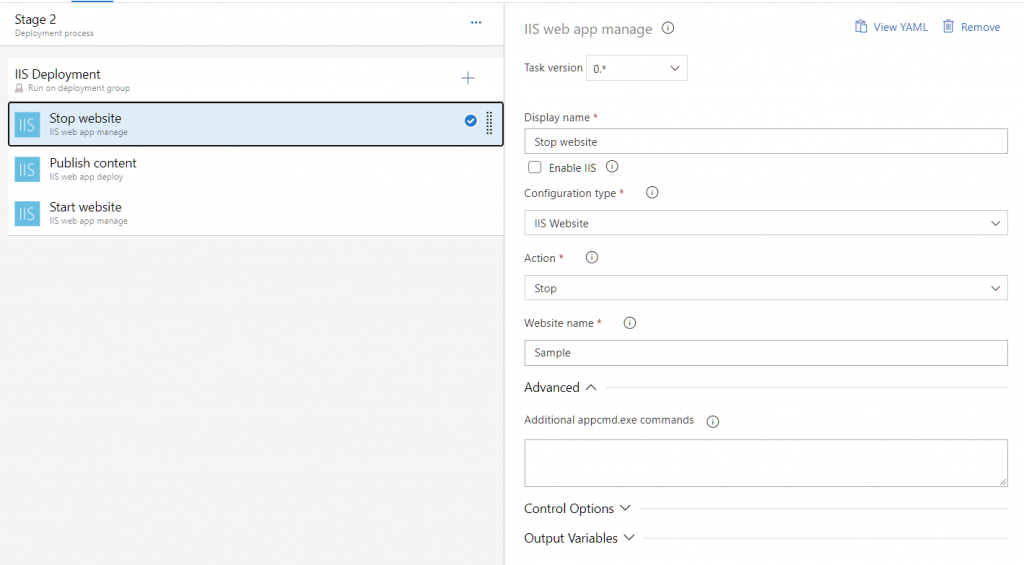
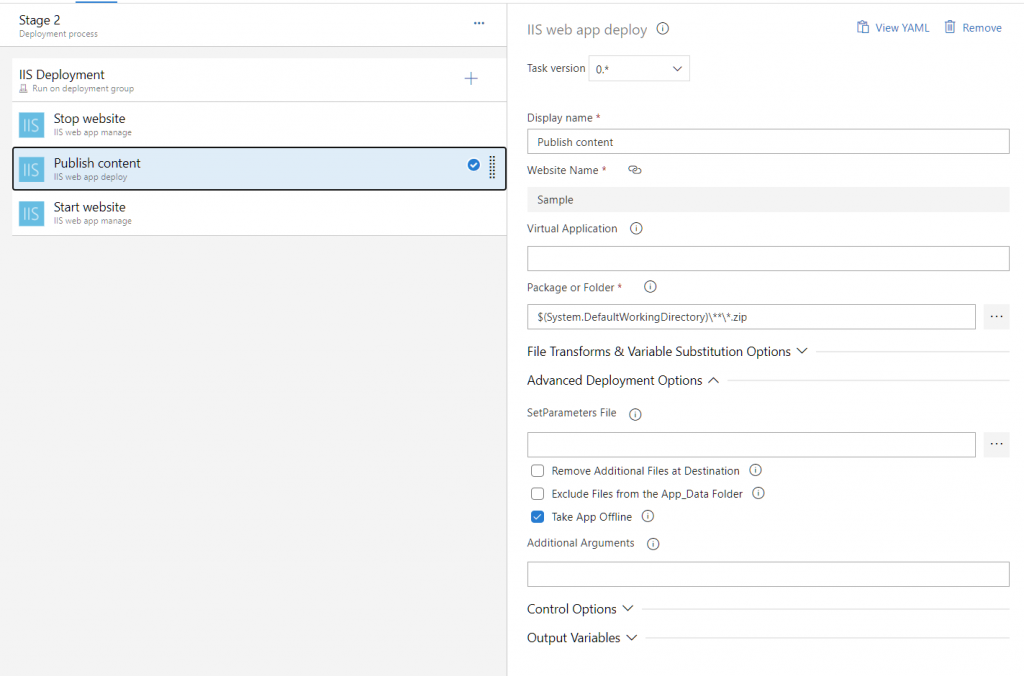
Now, right click on the ‘IIS Web app manage’ row and click ‘duplicate’. Rename the ‘IIS web app manage’ and the ‘IIS Web app deploy’ tasks as follows:
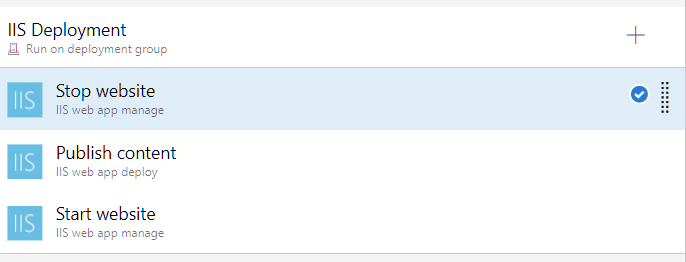
I always use this setup when deploying with IIS. The first step shuts down the website, the second step publishes the content, finally, the third step starts the IIS site again. This is done because .NET Core keeps some DLL files locked when your application is in use, resulting in a failed release sometimes.
Configure everything as follows:
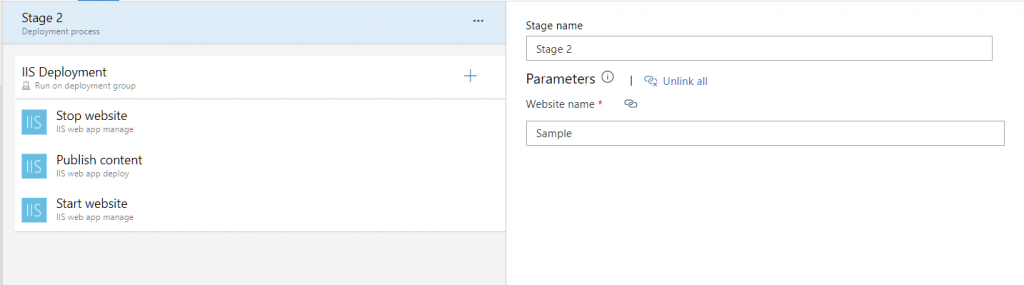
Website name = the IIS website name on your server
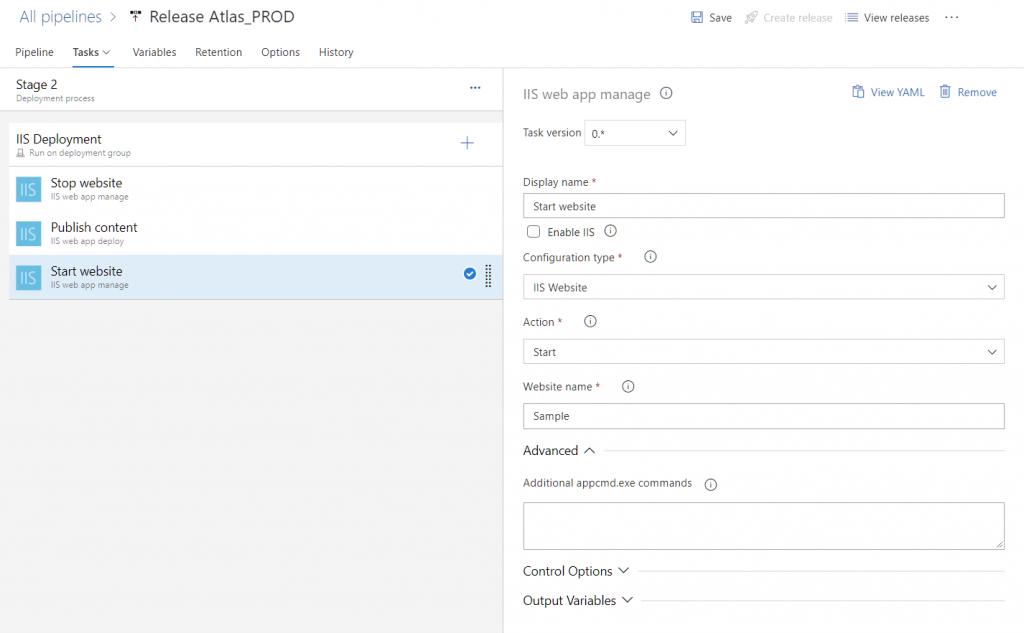
That’s it! The application will now automatically release a new version on your machine whenever your build pipeline successfully completes.
Various quick-start Azure build Pipeline YAML configurations
Below a few of our most used build pipeline configurations! For each configuration, replace the {projectname} with your own project name. Also replace the trigger at the top with the branch name you want to run the pipeline for.
.NET Core 3.1 MVC with NPM and Gulp
# ASP.NET Core
# Build and test ASP.NET Core projects targeting .NET Core.
# Add steps that run tests, create a NuGet package, deploy, and more:
# https://docs.microsoft.com/azure/devops/pipelines/languages/dotnet-core

trigger:
- master

pool:
  vmImage: 'ubuntu-latest'

variables:
  solution: '**/{projectname}.sln'
  buildPlatform: 'Any CPU'
  buildConfiguration: 'Release'

steps:
- task: NodeTool@0
  inputs:
    versionSpec: '10.x'
  displayName: 'Install Node.js'

- task: NuGetToolInstaller@1

- task: NuGetCommand@2
  inputs:
    restoreSolution: '$(solution)'

- task: Npm@1
  displayName: 'npm install'
  inputs:
    workingDir: 'src/{projectname}.Mvc'
    verbose: true

- task: gulp@0
  displayName: 'gulp build'
  inputs:
    gulpFile: src/{projectname}.Mvc/gulpfile.js
    targets: build

- task: DotNetCoreCLI@2
  displayName: 'Publish'
  inputs:
    command: 'publish'
    publishWebProjects: false
    projects: '**/{projectname}.Mvc.csproj'
    arguments: '--configuration $(buildConfiguration) --output $(Build.ArtifactStagingDirectory) /p:EnvironmentName=Production'
    zipAfterPublish: true

- task: PublishBuildArtifacts@1
  inputs:
      targetPath: '$(Build.ArtifactStagingDirectory)'
.NET Framework MVC with NPM and Gulp
# ASP.NET Core (.NET Framework)
# Build and test ASP.NET Core projects targeting the full .NET Framework.
# Add steps that publish symbols, save build artifacts, and more:
# https://docs.microsoft.com/azure/devops/pipelines/languages/dotnet-core

trigger:
- development

pool:
  vmImage: 'windows-latest'

variables:
  solution: '**/{projectname}.sln'
  buildPlatform: 'Any CPU'
  buildConfiguration: 'Release'
  DOTNET_HOST_PATH: 'dotnet'

steps:
- task: NuGetToolInstaller@1

- task: NuGetCommand@2
  inputs:
    restoreSolution: '$(solution)'

- task: Npm@1
  displayName: 'npm install'
  inputs:
    verbose: true
    workingDir: 'src/{projectname}.Mvc'

- task: Npm@1
  displayName: 'npm run copy-node-modules'
  inputs:
    verbose: true
    command: 'custom'
    customCommand: 'run copy-node-modules'
    workingDir: 'src/{projectname}.Mvc'

- task: Npm@1
  displayName: 'npm run create-bundles'
  inputs:
    verbose: true
    command: 'custom'
    customCommand: 'run create-bundles'
    workingDir: 'src/{projectname}.Mvc'

- task: VSBuild@1
  inputs:
    solution: '**/{projectname}.Mvc.csproj'
    msbuildArgs: '/p:DeployOnBuild=true /p:WebPublishMethod=Package /p:PackageAsSingleFile=true /p:SkipInvalidConfigurations=true /p:DesktopBuildPackageLocation="$(build.artifactStagingDirectory)\WebApp.zip" /p:DeployIisAppPath="Default Web Site" /p:EnvironmentName=Staging'
    platform: '$(buildPlatform)'
    configuration: '$(buildConfiguration)'
    msbuildArchitecture: x64

- task: PublishBuildArtifacts@1
.NET Core 3.1 API/Console/Class library project
# ASP.NET Core
# Build and test ASP.NET Core projects targeting .NET Core.
# Add steps that run tests, create a NuGet package, deploy, and more:
# https://docs.microsoft.com/azure/devops/pipelines/languages/dotnet-core

trigger:
- development

pool:
  vmImage: 'ubuntu-latest'

variables:
  buildConfiguration: 'Release'

steps:
- task: NuGetCommand@2
  displayName: 'Restore nuget packages'
  inputs:
    command: 'restore'
    restoreSolution: '**/*.sln'
    feedsToUse: 'select'
    vstsFeed: '22b7b215-fc48-4aa0-9ea1-ef6364aa988a'

- task: DotNetCoreCLI@2
  displayName: 'Build'
  inputs:
    command: 'build'
    projects: '**/{projectname}.csproj'
    arguments: '--configuration $(buildConfiguration)'
    feedsToUse: 'select'
    vstsFeed: '22b7b215-fc48-4aa0-9ea1-ef6364aa988a'

- task: DotNetCoreCLI@2
  displayName: 'Publish'
  inputs:
    command: 'publish'
    publishWebProjects: false
    projects: '**/{projectname}.csproj'
    arguments: '--configuration $(buildConfiguration) --output $(Build.ArtifactStagingDirectory) /p:EnvironmentName=Staging'

- task: PublishBuildArtifacts@1
  inputs:
      targetPath: '$(Build.ArtifactStagingDirectory)'
Angular 9/10
# Node.js with Angular
# Build a Node.js project that uses Angular.
# Add steps that analyze code, save build artifacts, deploy, and more:
# https://docs.microsoft.com/azure/devops/pipelines/languages/javascript

trigger:
- development

pool:
  vmImage: 'ubuntu-latest'

steps:
- task: NodeTool@0
  inputs:
    versionSpec: '10.x'
  displayName: 'Install Node.js'

- script: |
    npm install -g @angular/cli
    npm install
    ng build --prod
  displayName: 'npm install and build'

- task: ArchiveFiles@2
  inputs:
    rootFolderOrFile: 'dist'
    includeRootFolder: false
    archiveType: 'zip'
    archiveFile: '$(Build.ArtifactStagingDirectory)/$(Build.BuildId).zip'
    replaceExistingArchive: true

- task: PublishBuildArtifacts@1
  inputs:
      PathtoPublish: '$(Build.ArtifactStagingDirectory)'
      ArtifactName: 'drop'
      publishLocation: 'Container'